Introduction:
Central breakout in an SD-WAN environment is a network design where all internet-bound traffic from branch offices (spokes) is routed through a central hub, typically a corporate data center, before reaching the internet. This method is commonly used in a hub-and-spoke topology, where the hub serves as the central point of connectivity for one or multiple branch sites.
The main purpose of central breakout is to provide enhanced security, centralized policy enforcement, and consistent monitoring of all traffic, while ensuring connectivity between the hub and branch offices. By using this design, organizations can control network traffic effectively and simplify IT operations.

Steps 1: Go to the Parent Cluster, navigate to SD-WAN, select Network, and click Create an SD-WAN Network.

Steps 2:
Name: Enter the tunnel name.
Description: Provide a brief description of the tunnel.
CIDR: Specify the tunnel IP range. Each device will automatically receive an IP from this network. You can specify both the network IP and the subnet.
SLA: Choose the default SD-WAN SLA profile.
Topology: Select HUB_AND_SPOKE.
Does the HUB device have a public IP?
Enable this option if the Hub device has a static public IP address.
Do you want to enable an L2 tunnel?
Enable this option if you want to create a Layer 2 tunnel over Layer 3.
Enable WAN Optimization:
Enable this option if you want to apply WAN optimization algorithms.
MTU: Select the appropriate MTU size for the tunnel.
Cipher: Choose one of the available encryption methods — AES or ChaChaPoly and Save

Steps 3: Go to the Actions button and click the View Members.

Steps 4: Go to the Add Appliance and click

Steps 5:
Name: Enter the HUB device name.
Appliance: Select the HUB device’s MAC address.
Appliance Public IP: Enter the static public IP configured on the HUB device.
Type: Select HUB, since we are configuring the HUB device.

Navigate to Advanced and select SD-WAN Algorithms (Session-Based Weighted Load Balancing)

1.Session-Based Weighted Load Balancing
What it is:
Entire sessions or flows (like a TCP connection or video stream) are assigned to tunnels based on a weighting factor.
Weighting factor examples:
Bandwidth availability
Tunnel cost
Latency or packet loss
How it works:
A new session is assigned to a tunnel according to its weight (heavier weights get more sessions)
Once assigned, all packets in that session stick to the same tunnel.
Benefit:
Prevents packet reordering (important for TCP applications)
Balances traffic intelligently across multiple links
Use Case:
Best for web traffic, file transfers, or streaming that needs session consistency.
2. Packet Cloning
What it is:
Copies a packet and sends it simultaneously over two or more tunnels.
Purpose:
Ensures high-priority or sensitive traffic (like VoIP, video calls, or critical application data) reaches its destination even if a tunnel experiences packet loss.
How it works:
Original packet sent on the primary path
Duplicate packet sent on a secondary path
Destination discards duplicates but keeps the first arriving packet
Benefit:
Improves reliability on lossy or unstable links.
Trade-off:
Uses more bandwidth, so typically reserved for critical traffic.
3. Per-Packet Weighted Load Balancing
What it is:
Instead of entire sessions, individual packets are distributed across tunnels according to weight.
How it works:
Each packet can take the “best” path based on real-time link metrics (latency, jitter, packet loss)
Weighted distribution ensures tunnels are used according to capacity or performance
Benefit:
Maximizes link utilization
Reduces congestion dynamically
Trade-offs:
Can cause packet reordering, which may affect TCP performance or some real-time apps
Use Case:
Often used for stateless traffic or when ultra-low latency is critical (e.g., some video streaming or UDP-based apps)
4. Best Path (Dynamic Path Selection)
What it is:
The SD-WAN continuously monitors network metrics and sends traffic over the optimal path at any moment.
Metrics Considered:
Latency
Jitter
Packet loss
Bandwidth availability
How it works:
Real-time telemetry from each tunnel
Policies or SLAs define which tunnel is “best” for each type of traffic
Benefit:
Ensures performance-sensitive applications always get the best available path
Provides automatic failover if a tunnel degrades
How They Work Together
Critical traffic → Packet cloning for reliability.
Regular traffic → Session-based weighted load balancing (keeps TCP flows consistent).
High-performance or stateless traffic → Per-packet weighted load balancing (maximizes speed).
All traffic → Monitored via Best Path algorithm to dynamically reroute if a tunnel degrades.
Steps 6: Select all WAN links that you want to include in the Session-Based Weighted Load Balancing algorithm. This ensures that traffic sessions are distributed across the selected links according to their assigned weights, optimizing bandwidth utilization and improving overall network performance.

Steps 7: In this step, Go to other subnet put this 0.0.0.0/0 as the local Lan Subnet. This represent all IP address and ensures that all internet-bound traffuc from the branch is routed the central hub by using 0.0.0.0/0.

Steps 8: In this step, choose whether the incoming traffic from the tunnel should be forwarded to the LAN side or the WAN side. After making your selection, click Save.

You can now see that the HUB device has been successfully added to the tunnel.
Purpose of Enabling Forward NAT, Reverse NAT, and Creating Reverse NAT Rule
When configuring central breakout in an SD-WAN hub-and-spoke topology, it is important to enable Forward NAT and Reverse NAT, and create a Reverse NAT rule for the following purposes:
Forward NAT (Source NAT):
Ensures that traffic leaving the branch through the SD-WAN tunnel uses the hub’s public IP address as the source IP when accessing the internet.
This allows centralized management of outgoing traffic and ensures proper routing and security enforcement from the hub.
Reverse NAT (Destination NAT):
Allows traffic coming back from the internet to be correctly translated and routed to the originating device in the branch.
This ensures that return traffic reaches the correct internal host behind the SD-WAN tunnel.
Creating a Reverse NAT Rule:
Configures the hub to automatically map incoming responses back to the correct branch IP addresses.
Essential in central breakout scenarios because all branch internet traffic passes through the hub, so proper NAT mapping is required to maintain connectivity and session integrity.
Summary:
Enabling Forward NAT and Reverse NAT, along with a Reverse NAT rule, ensures that all traffic flowing through the central hub is properly translated, routed, and reachable, maintaining seamless communication between the branch and external networks while centralizing security and monitoring.Note: If SD WAN rules is created by default, it is acceptable to use them. Otherwise, you may nees to craete new rules.
Now, go to the HUB site (Child cluster).- Followed Step:Navigate to the SD-WAN section, select SD-WAN Rules, then click Create SD- WAN and Save.

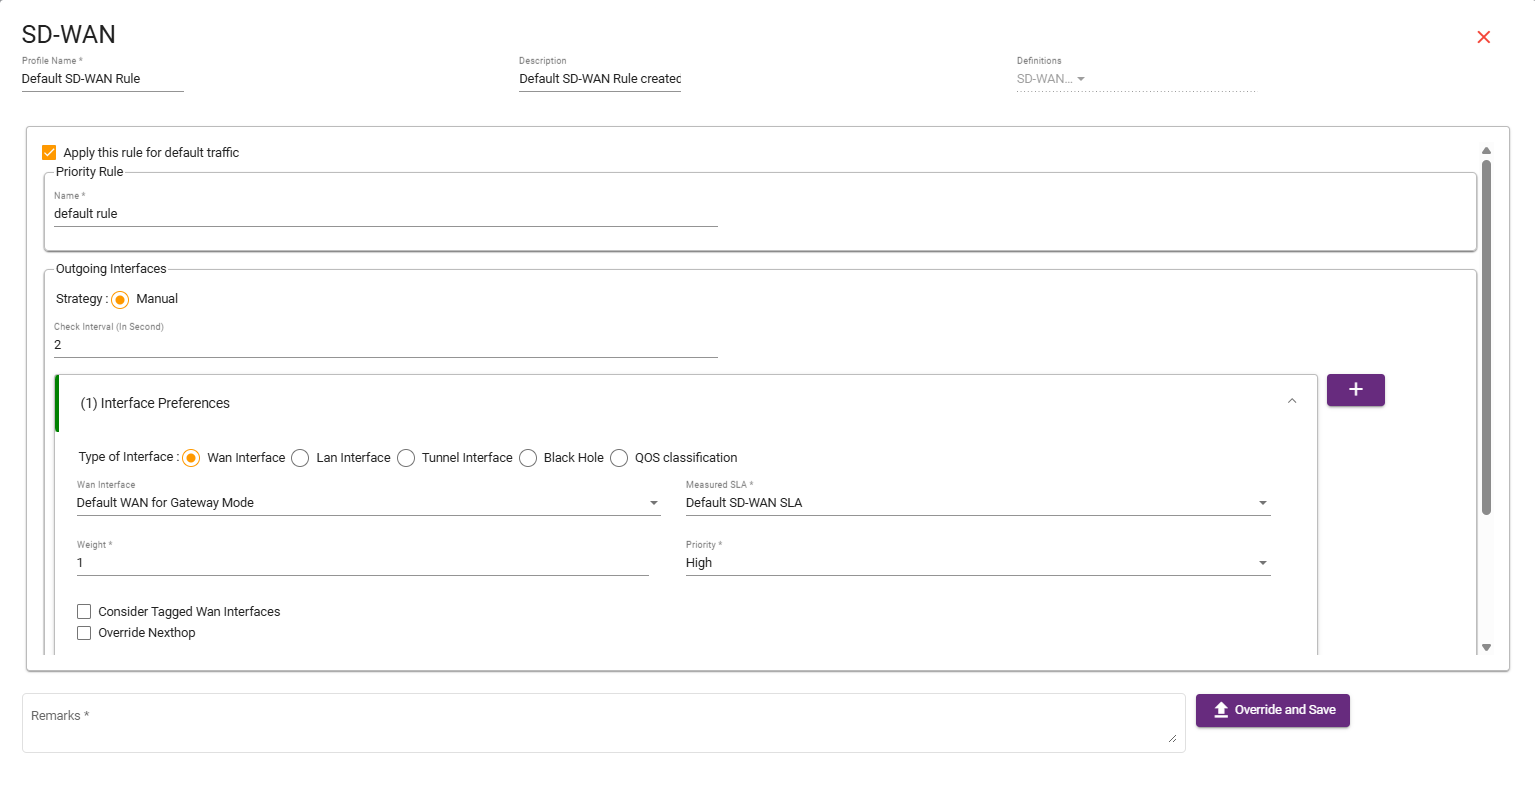

Steps 9:
Name: Enter the SPOKE device name.
Appliance: Select the SPOKE device’s MAC address.
Type: Select SPOKE, since we are configuring the SPOKE device.

Navigate to Advanced and select SD-WAN Algorithms (Session-Based Weighted Load Balancing)
Steps 10: Select all WAN links that you want to include in the Session-Based Weighted Load Balancing algorithm. This ensures that traffic sessions are distributed across the selected links according to their assigned weights, optimizing bandwidth utilization and improving overall network performance.

Steps 11: Select the local LAN subnets you want to share with other devices within the same tunnel. In this example, a single network has been added. This network will be associated with the HUB device, allowing users to access the 192.168.11.1/24 subnet through the Spoke device.

Steps 12: Outbound Forwarding
Select whether the incoming traffic from the tunnel should be forwarded to the LAN side or the WAN side.
Once selected, click SAVE.

Note: On the spoke side, SD-WAN member rules and SD-WAN SLA must be created for this configuration. This is an important step to ensure proper traffic routing and policy enforcement.
- Followed Step:Now, go to the SPOKE site (Child cluster).
- SD-WAN SLA: Navigate to the spoke branch and create the required SD-WAN SLA and SAVE


- SD-WAN rules: Now, create the required SD-WAN rules and SAVE. This is a crucial step to ensure proper traffic routing and network functionality.


Conclusion:
Central breakout in a hub-and-spoke SD-WAN topology is a design choice that prioritizes security, centralized policy enforcement, and consistent monitoring over speed and bandwidth efficiency. It is ideal for organizations that require strict control over internet-bound traffic, need to maintain regulatory compliance, or support legacy applications hosted in a central data center.
While it introduces some latency and requires higher bandwidth at the hub, the benefits of centralized control and security make it a widely adopted solution in enterprise networks.